|
|
Forward Mail for a user
Forward email to another email account
Start or stop forwarding email sent to Office 365 or to another
Microsoft Exchange-based email service by changing settings in Outlook
Web App.
Use forwarding settings in Outlook Web App to automatically
forward all email sent to your Office 365 or other Microsoft
Exchange-based account to another account.
Use settings in Outlook Web Access to automatically forward all
email sent to your Office 365 or other Exchange-based email service to
another email service. Follow the steps in this article to learn how to
set up forwarding in Outlook Web Access. If you'd like to learn about
setting up forwarding using Inbox rules in Outlook Web Access or in
Outlook 2013, see What else do I need to know?
Note If you don’t see the Connected accounts tab on the Accounts page, you can’t set up forwarding using the steps in this article. For more information, see What else do I need to know?
In this article
-
Set email forwarding for your account
-
Stop email forwarding
-
Change email forwarding settings
-
What else do I need to know?
Set email forwarding for your account
-
Sign in to Outlook Web App. For help, see Sign in to Outlook Web App. (AS THE USER)
-
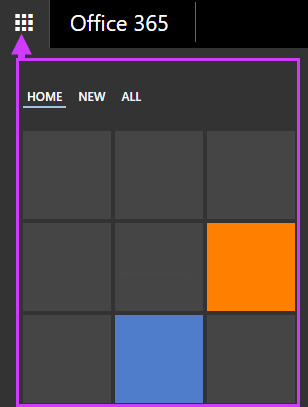
At the top of the page, choose Outlook (or Mail). Or, choose the app launcher  > Mail. > Mail.

-
At the top of the page, select Settings  > Options, and then select one of the following: > Options, and then select one of the following:
-
Do one of the following, depending on the options you see:
-
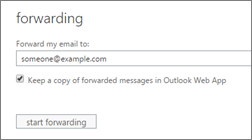
Under Forwarding, enter the email address you want to forward your Outlook Web App email to, set or clear the Keep a copy of forwarded messages in Outlook Web App check box, and then select Start forwarding.

OR
-
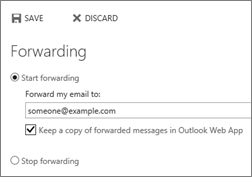
Select Start forwarding, enter the email address you want, set or clear the Keep a copy of forwarded messages in Outlook Web App check box, and then select Save.

Stop email forwarding
-
In Outlook Web App, select Settings  > Options > Account > Connected accounts (or Mail > Accounts > Forwarding). > Options > Account > Connected accounts (or Mail > Accounts > Forwarding).
-
Select Stop forwarding.
Change email forwarding settings
After you’ve set up email forwarding, you may want to change the
address your email should be forwarded to. You may also want to change
the setting for keeping a copy of your email in your mailbox.
-
Sign in to Office 365 with your work or school account.
-
At the top of the page, choose Outlook (or Mail). Or, choose the app launcher  > Mail. > Mail.

-
At the top of the page, select Settings  > Options, and then select one of the following: > Options, and then select one of the following:
-
Do one or both of the following:
-
To change the email address your mail should be forwarded to, in the Forward my email to box, edit the email address.
-
To change the setting for keeping a copy of messages in your mailbox, select or clear the Keep a copy of forwarded messages in Outlook Web App check box.
-
Select Save.
What else do I need to know?
-
If you don't see the Connected accounts tab under Accounts,
forwarding may not be available for your account. You may be able to
set up forwarding using Inbox rules. For more information, see Use rules in Outlook Web App to automatically forward messages to another account.
-
If you keep a copy of forwarded messages, you should check
your Outlook Web App account regularly to make sure you haven't exceeded
your mailbox size limit. If the size limit is exceeded new messages may
not be forwarded.
-
Connected Accounts and Forwarding aren't meant to be used at
the same time. Use Connected Accounts when you want email that's sent to
other accounts that you own to be delivered to Outlook Web App. Use
Forwarding to have email that's delivered to your Outlook Web App
account be forwarded to other accounts. For more information, see Connect email accounts in Outlook on the web.
-
You can also set up forwarding using Inbox rules in Outlook
Web App. When you use Inbox rules to set up forwarding, you have access
to advanced options, including the option to forward your email to more
than one email address. For more information, see Use rules in Outlook Web App to automatically forward messages to another account.
-
For information about how to set up forwarding using Inbox rules in Outlook 2013, see Forward messages automatically with a rule.
|
|


 > Mail.

 > Options, and then select one of the following:


 > Options > Account > Connected accounts (or Mail > Accounts > Forwarding).